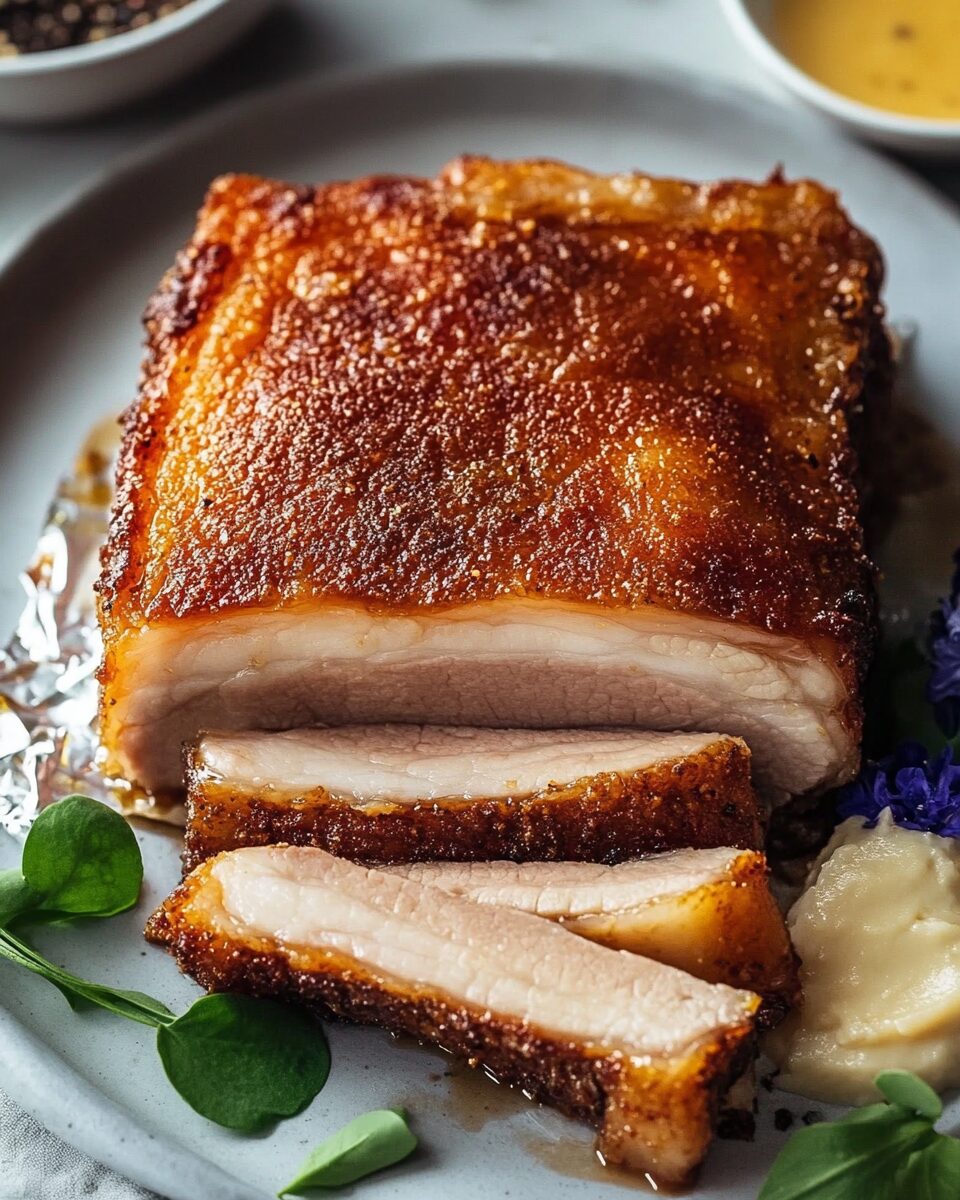
The joy of pork belly lies in the contrast—tender, juicy meat layered beneath a golden, crispy crackling that shatters with every bite. This slow-roasted version is a masterpiece of texture, flavor, and technique, perfected with three game-changing tips: no scoring, low then high heat, and precise leveling. The result? Guaranteed crackling success every single time.
Perfect for Sunday dinner, entertaining guests, or treating yourself to an indulgent culinary reward, this pork belly takes a little patience but offers enormous payoff. Paired with a simple apple sauce or vermouth jus, it’s elegant, satisfying, and absolutely unforgettable. Plate it rustic or fine-dining style—either way, it’s a centerpiece worthy of applause.
Full Recipe:
-
1 kg / 2.2 lb pork belly, skin on (not scored)
-
1 ½ tsp olive oil, divided
-
½ tsp fennel powder (optional)
-
1 tsp kosher salt, divided
-
¼ tsp black pepper
Directions:
-
Place the pork belly on a plate skin-side up. Pat dry thoroughly. Leave uncovered in the fridge overnight to dry the skin (or pat it very dry if you’re short on time).
-
Preheat oven to 140°C / 285°F (120°C fan).
-
Flip pork belly flesh-side up. Drizzle with 1 tsp oil. Season with fennel powder, ½ tsp salt, and pepper. Rub well into flesh and sides.
-
Wrap the flesh tightly in foil to create a snug open-top box, leaving the skin fully exposed.
-
Flip back to skin-side up. Pat dry again if needed. Rub ½ tsp oil over skin. Sprinkle remaining ½ tsp salt evenly across the skin.
-
Roast on a tray for 1.5 hours. Tighten the foil to snug fit again, and roast another hour (2.5 hours total).
-
Remove pork and raise oven to 240°C / 465°F.
-
Transfer pork to a rack over a tray. Use scrunched foil to level the skin so it’s flat and even.
-
Roast for 30 minutes until the crackling is golden, puffed, and crispy. Rotate if needed.
-
Rest for 10 minutes before slicing into thick, satisfying slabs.
Prep Time: 10 minutes (plus overnight drying) | Cooking Time: 3 hours | Total Time: 3 hrs 10 min (or overnight + cook time)
Kcal: 1313 kcal | Servings: 4
The Beauty of Crispy Pork Belly
Few dishes evoke as much excitement at the dinner table as crispy pork belly. A true showstopper, it balances deep, succulent flavor with that irresistible crunch we crave in well-rendered pork skin. Long beloved across cultures—whether it’s Chinese siu yuk, Filipino lechon kawali, or the classic European roast—pork belly has become a globally celebrated dish, and for good reason. This particular recipe hones in on the technique of slow roasting to achieve juicy, tender meat and ultra-crisp, bubbly crackling, elevating this cut of meat into something truly gourmet.
Why This Recipe Works So Well
The genius of this pork belly preparation lies in three deceptively simple yet transformative techniques. First, no scoring of the skin—a counterintuitive method that actually protects the crackling from becoming rubbery. Second, slow roasting the pork belly at a low temperature helps render fat gently while keeping the meat moist and flavorful. And third, using foil balls to level the skin ensures even heat distribution so that every square inch of crackling comes out perfectly golden and crisp.
These are not just cooking tips—they’re game-changers. They resolve some of the most common pitfalls of home-cooked pork belly: dry meat, chewy skin, or patchy crisping. With these techniques, you achieve professional-level results using a standard oven and minimal ingredients.
The Importance of Drying the Skin
One of the most critical components of this dish is the drying process. Pork skin, when moist, resists crisping and can become unpleasantly rubbery. To mitigate this, the pork belly should be left uncovered in the fridge overnight. This process dehydrates the skin, drawing out surface moisture and setting the stage for a blistered, glass-like crackling once exposed to high heat. Even if you’re using vacuum-packed pork (which usually has wetter skin), this drying method drastically improves your results.
Why You Shouldn’t Score the Skin
Traditionally, recipes call for scoring pork skin—making shallow cuts to encourage the fat underneath to render more easily and help the skin puff up. However, this method introduces serious risk: one wrong cut into the flesh can allow meat juices to leak onto the surface, sabotaging your crackling. The secret here is to not score the skin at all. Instead, a light coating of oil and a generous, even application of salt is all it takes to achieve an amazing crust. Skipping the score may feel unnatural, but the results speak for themselves—less risk, more crisp.
Achieving the Perfect Roast: Low and Slow
This pork belly recipe uses a two-phase roasting process. First, a low and slow cook at 140°C (285°F) for 2.5 hours helps melt down the internal fat while gently cooking the meat to perfect tenderness. During this phase, the meat bastes in its own fat, almost confit-style, without drying out. This step is crucial not only for tenderness but for setting the foundation for the final texture of the skin.
In the second phase, the oven is cranked up to 240°C (465°F) for about 30 minutes. This high-heat blast finishes the skin, puffing it up and transforming it into brittle, mouthwatering crackling. Timing and temperature control are key here, but once mastered, the technique becomes foolproof.
Using Foil for Leveling: A Home Cook’s Hack
One of the most overlooked aspects of pork belly cooking is surface leveling. After a long cook, the belly may warp slightly, creating an uneven surface that can result in burnt or underdone spots on the skin. The solution? Use scrunched-up balls of foil to level the skin. By propping up the meat until the skin is as horizontal as possible, you ensure even exposure to the oven’s heat. This small adjustment has a huge payoff—it makes the difference between patchy results and uniformly crisp crackling.
Selecting the Right Cut of Pork Belly
Success starts with choosing the right cut. Look for pork belly with the following features:
-
An even thickness across the slab
-
Dry, unwrinkled, flat skin (ideally not vacuum-packed)
-
A good ratio of meat to fat, avoiding pieces that are too thin or lean
High-quality, free-range pork also tends to yield better flavor and texture. Freshness matters too—your local butcher will likely provide a better product than most supermarkets.
Pairing Sauces and Sides
Although the pork belly itself is rich and flavorful enough to stand alone, thoughtful accompaniments can turn it into a five-star meal. A classic apple sauce offers a tart, sweet contrast to the savory pork, while a vermouth jus elevates the dish to fine-dining territory.
Other options include:
-
Cauliflower purée: Light, creamy, and a great counterbalance to the fat
-
Pea purée: For a fresh and vibrant pairing
-
Mustard sauces: Particularly Dijon or honey mustard
-
Salsa verde: Brings brightness and herbaceous flavor
-
Chimichurri: For a zesty, garlicky twist
On the side, opt for something light and crisp—think arugula salad, green beans, or roasted carrots. Heavier sides like mashed potatoes are fine too, but a little goes a long way.
Make-Ahead and Reheating Tips
One of the unsung advantages of this pork belly recipe is how make-ahead friendly it is. Once cooked, it can be stored in the fridge (foil-wrapped, crackling exposed) and reheated without sacrificing much texture. The trick is to separate the meat and the crackling for reheating: microwave the meat and oven-toast the skin.
For reheating whole, use a low oven and re-crisp the crackling at high heat just before serving. Just ensure the pork is fully cooled before storing to avoid soggy skin.
Presentation and Plating Ideas
Whether you’re serving family-style or going for elegant plating, pork belly can be surprisingly versatile. For casual meals, slice it thick and serve atop a rustic wooden board with dips and sides. For a more polished look, plate over puréed vegetables and drizzle with jus or reduction sauces. Garnish with microgreens, edible flowers, or watercress for color and contrast.
In a restaurant-style presentation, slice the belly into uniform rectangles, smear purée across the plate, fan out the slices, and add small dots of apple sauce and a spoonful of jus. It’s an impressive dish for guests and surprisingly easy to execute with a bit of planning.
Advertisement
Why This Recipe Belongs in Every Home Cook’s Arsenal
Pork belly is often reserved for special occasions, but this method makes it accessible for any ambitious home cook. With only a few ingredients and some patience, you can create a meal that rivals fine-dining restaurants. It’s cost-effective, flavor-packed, and endlessly adaptable depending on your preferred sauces and sides.
More than that, mastering pork belly teaches you fundamental kitchen skills—temperature control, fat rendering, and flavor balancing. It gives you confidence to take on other cuts and complex dishes in the future.
Conclusion
Crispy Slow Roasted Pork Belly isn’t just a recipe—it’s a celebration of texture, simplicity, and time-tested cooking techniques. By skipping the score, roasting low and slow, and using clever tricks like foil leveling, you set yourself up for pork perfection. Each bite is a reward: juicy meat beneath golden, shattering crackling.
It’s the kind of dish that commands attention, draws compliments, and leaves people asking for seconds. Whether it’s your first attempt or your fiftieth, this pork belly recipe is one you’ll return to again and again—not just for its flavor, but for the joy it brings to every table.