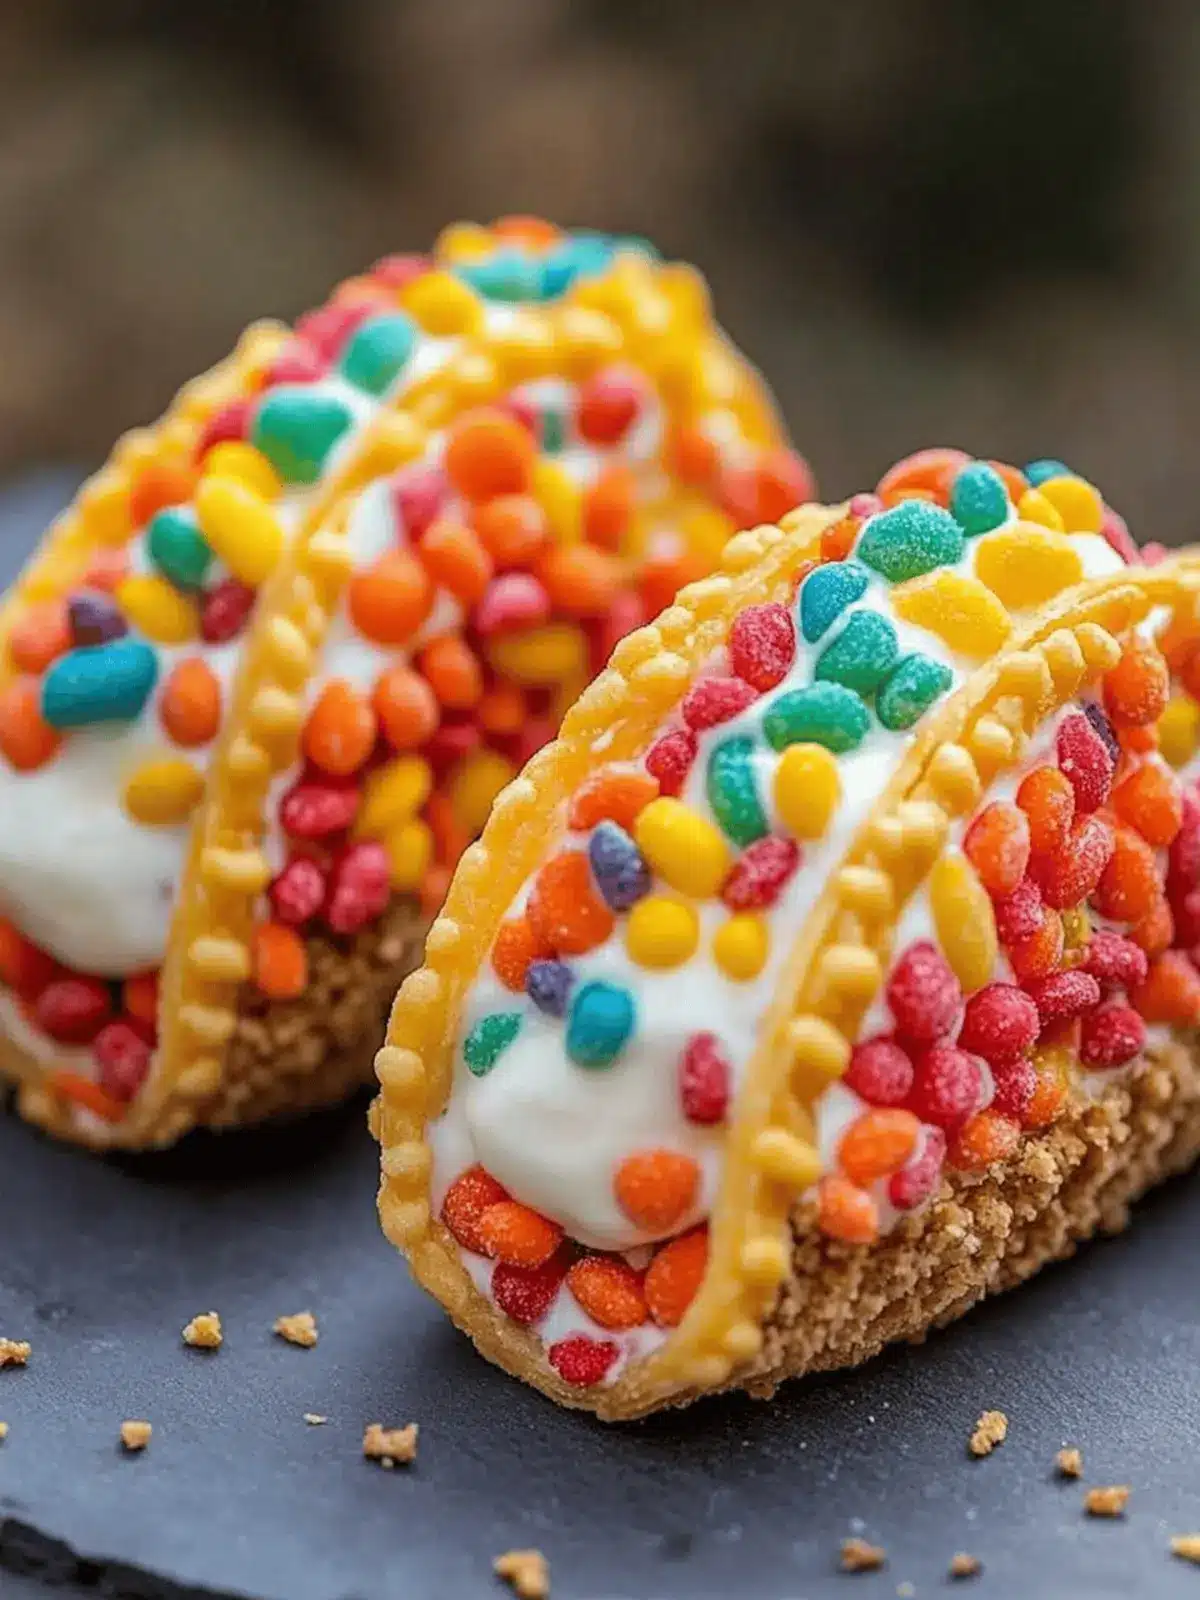
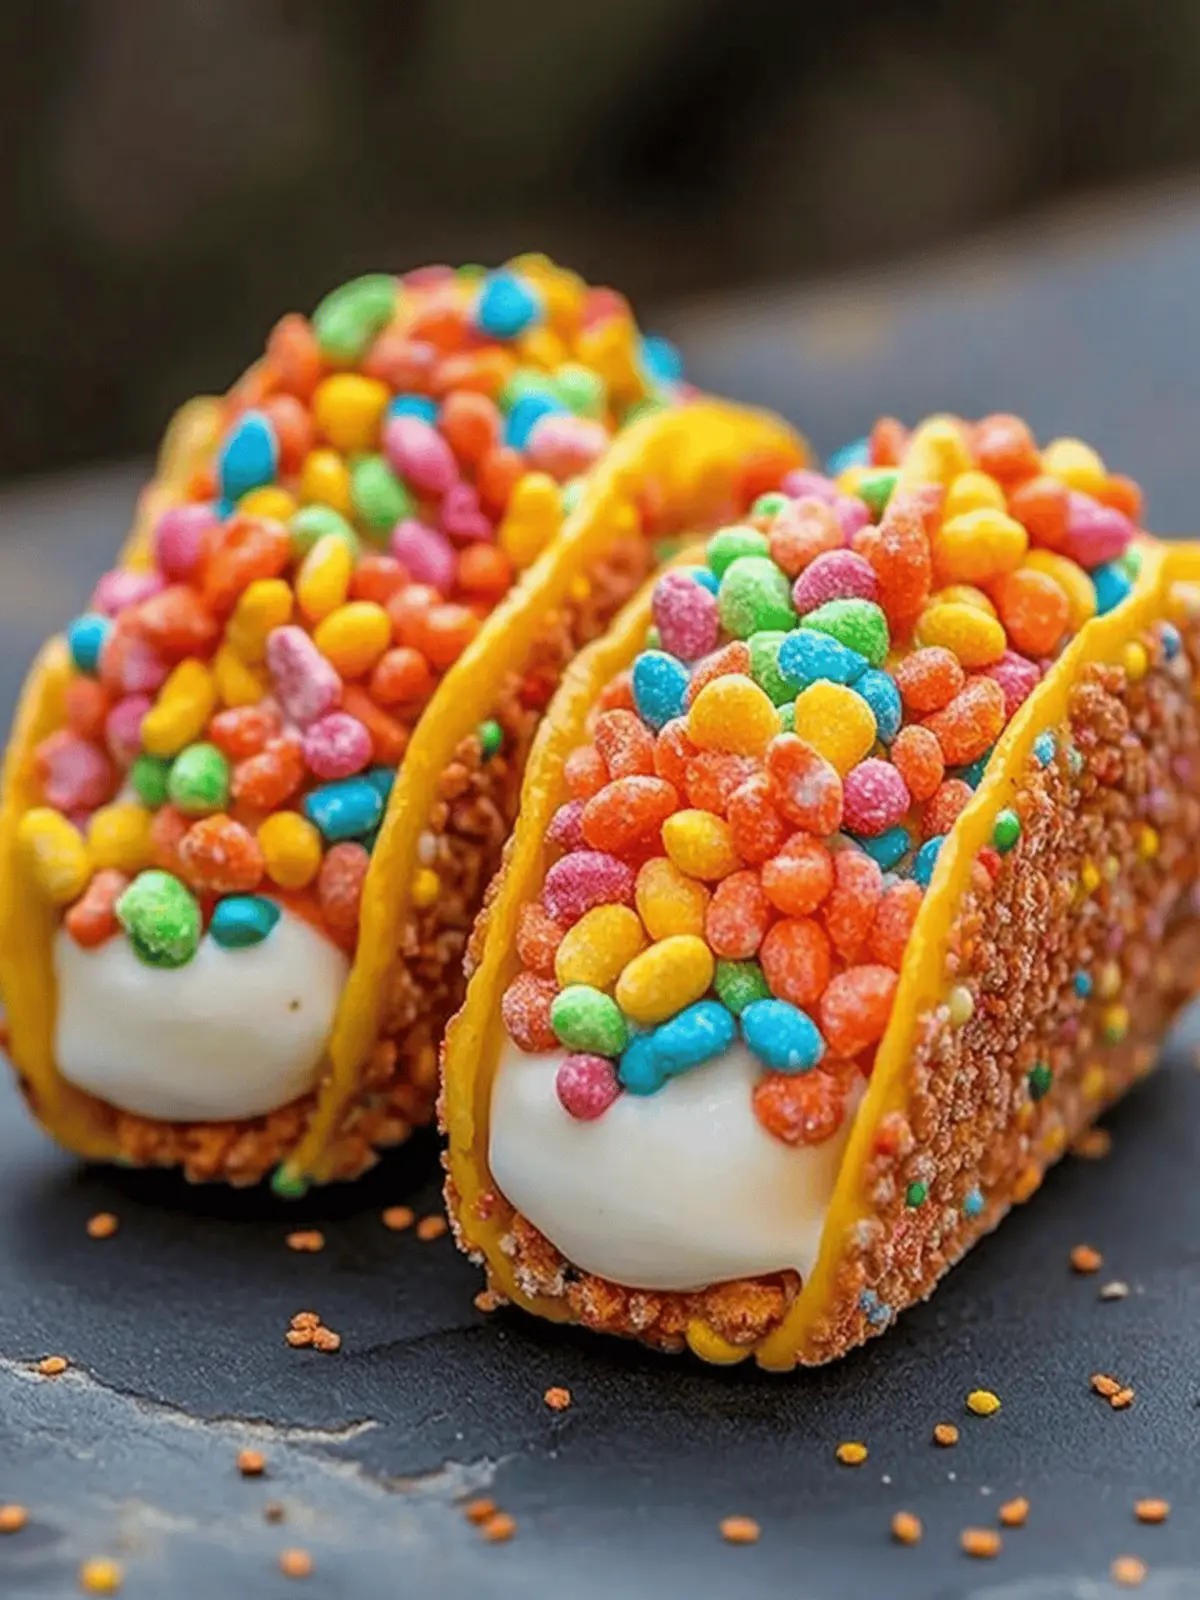
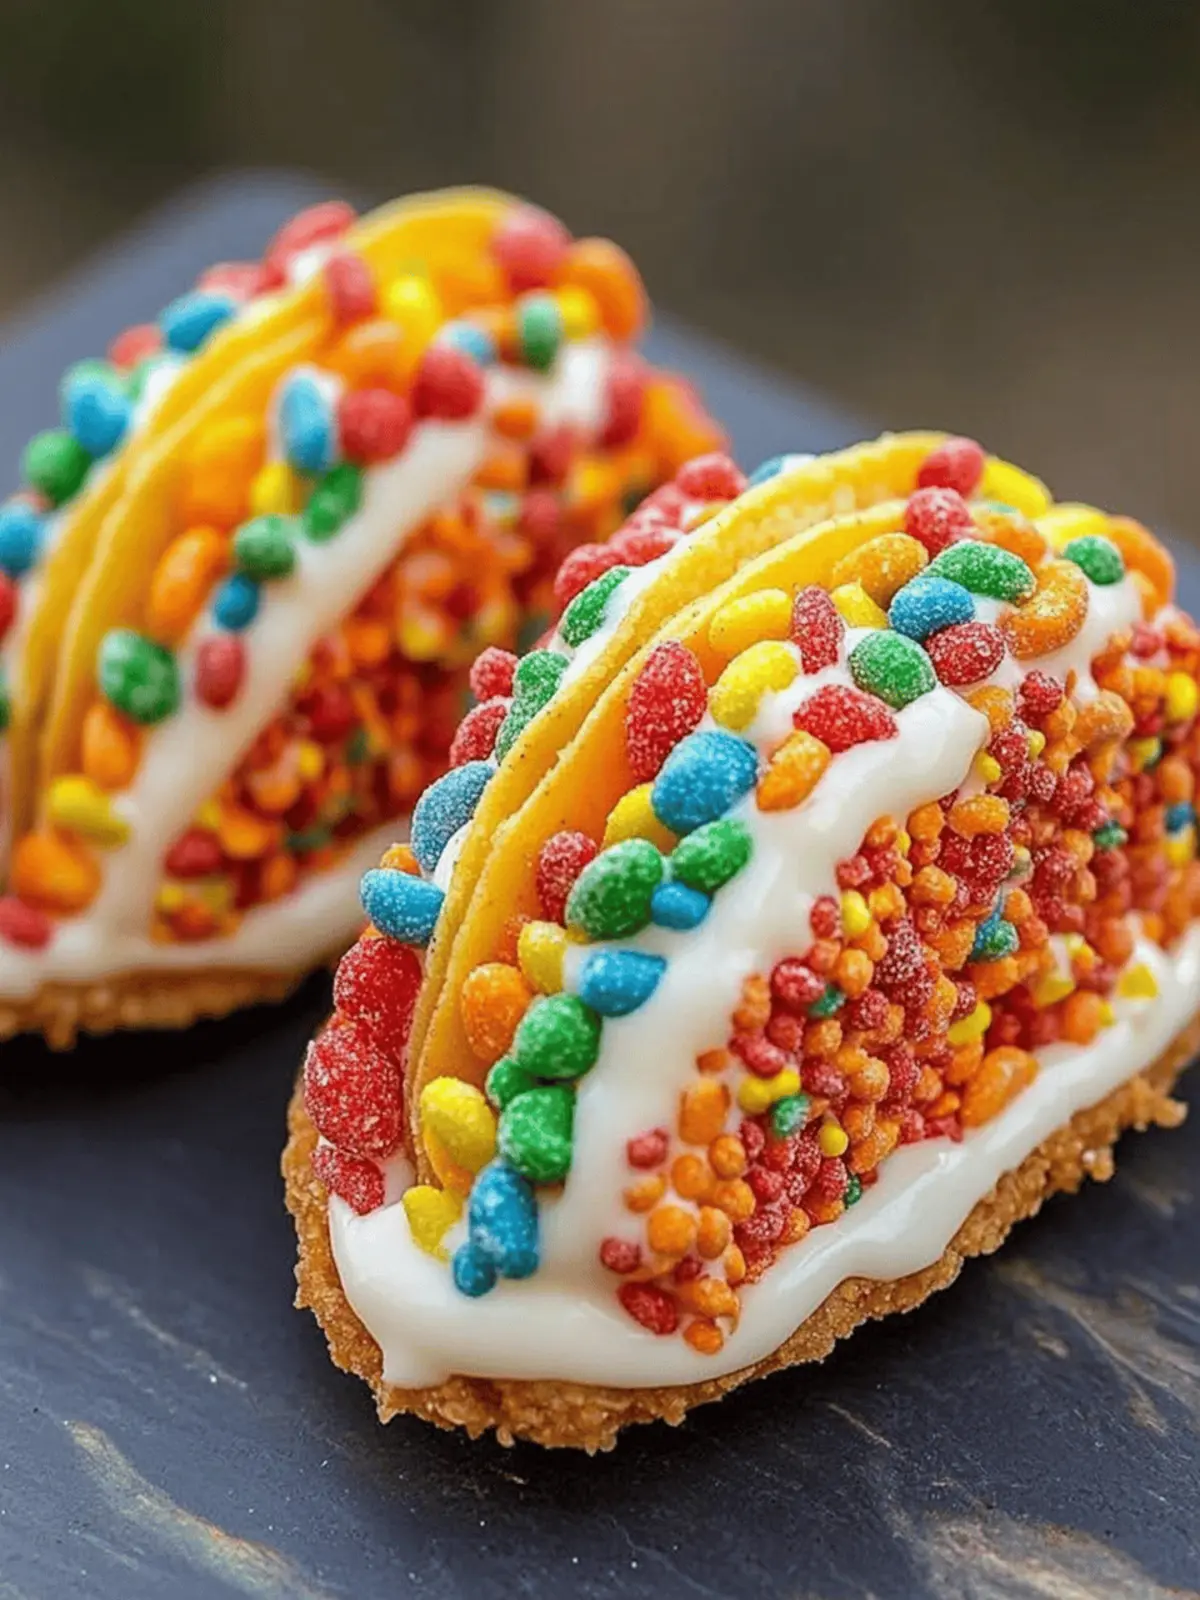
There’s something undeniably cheerful about the sight of colorful Fruity Pebbles, and when I discovered how to transform that nostalgic favorite into a dessert taco, it felt like a kitchen revelation. Imagine biting into a crunchy taco shell made from your beloved fruity cereal, filled with a rich, creamy cheesecake that’s as vibrant as it is delicious. These Fruity Pebbles Cheesecake Tacos are not just a treat for your taste buds; they’re a feast for the eyes too.
Perfect for everything from casual family nights to festive celebrations, this playful dessert offers an effortless way to enjoy a unique twist on traditional tacos. With minimal prep time and a delightful assembly, they’re a hit with both kids and adults alike, making dessert time a fun experience for everyone involved. So let’s dive in, because indulging in this fusion of flavors and textures is bound to become a new favorite in your household!
Why Love Fruity Pebbles Cheesecake Tacos?
Joyful Assembly: These tacos are not only a visual delight; making them is an interactive experience. Kids and adults alike will have fun filling their own tacos!
Burst of Flavor: The sweet, fruity cereal pairs perfectly with the silky cheesecake, creating a dessert that’s not just tasty but also exciting, making every bite a joyful surprise.
Quick Preparation: With just a few simple steps, you can whip these up in no time, making them the perfect last-minute dessert for any gathering.
Versatile Fun: Feel free to swap the crispy shells with your favorite cereal, transforming this recipe to fit any season or occasion with ease.
Crowd-Pleasing Appeal: Because everyone loves tacos and cheesecake, bringing these together will surely impress your guests and bring smiles to faces!
Fruity Pebbles Cheesecake Tacos Ingredients
For the Shells
- Fruity cereal – This provides the vibrant base for the taco shells; feel free to choose any colorful, fruity brand you love.
- Unsalted butter – Melting this will help bind the cereal together, ensuring a rich flavor and crunchy texture.
For the Filling
- Cream cheese – At room temperature, this creamy essential brings depth and richness to your cheesecake filling.
- Powdered sugar – Sift this before adding to the cream cheese to achieve that smooth, sweet filling without any lumps.
- Vanilla extract – A splash of pure vanilla will elevate the flavor of the cheesecake, making it even more delicious.
- Whipped cream – Light and fluffy, this will give your cheesecake filling an airy texture; fold gently to keep it light.
For Garnish
- Additional fruity cereal – Sprinkle this on top of each filled shell for added crunch and a pop of color; it enhances the visual appeal of your Fruity Pebbles Cheesecake Tacos.
How to Make Fruity Pebbles Cheesecake Tacos
-
Prepare Shells: Start by mixing the fruity cereal with melted butter in a large bowl until every piece is coated. Press this mixture firmly into taco-shaped molds or muffin tins and chill in the refrigerator for at least 30 minutes to set.
-
Make Filling: In a mixing bowl, beat the cream cheese until it’s fluffy and smooth. Gradually add sifted powdered sugar and vanilla extract, combining until fully incorporated and creamy.
-
Fold in Whipped Cream: Using a spatula, gently fold the whipped cream into the cream cheese mixture. Be sure to do this carefully, as you want to keep that lovely light and airy texture.
-
Assemble Tacos: Once the shells are set and firm to the touch, generously spoon the creamy cheesecake filling into each shell, taking care not to overfill.
-
Garnish: Sprinkle additional fruity cereal over the top of each filled shell for a delightful crunch and a burst of color. Serve immediately or chill briefly for firmer tacos.
Optional: Drizzle with chocolate sauce for an extra decadent touch!
Exact quantities are listed in the recipe card below.
What to Serve with Fruity Pebbles Cheesecake Tacos?
These delightful tacos are a burst of fun and flavor, perfect for any occasion where you want to impress and treat loved ones.
-
Fresh Berry Salad: A medley of strawberries, blueberries, and raspberries offers a refreshing contrast to the rich cheesecake filling. The natural sweetness balances the dessert’s creaminess beautifully.
-
Vanilla Ice Cream: The smooth, sweet creaminess of vanilla ice cream complements the texture of the crunchy shells, making every bite a delightful indulgence.
-
Chocolate Drizzle: A light drizzle of chocolate sauce adds an extra layer of decadence that perfectly enhances the fruity flavors of the tacos. A simple touch that elevates the presentation too!
-
Whipped Cream Topping: Serve with an extra dollop of whipped cream on the side for those who crave more fluffiness and creaminess. It’s a classic, comforting addition that everyone loves.
-
Sparkling Lemonade: A glass of fizzy lemonade brings a zesty brightness, cutting through the richness of the cheesecake and adding a celebratory feel to your sweet gathering.
-
Fruit Kebabs: Colorful fruit skewers make for a fun, vibrant side that echoes the fruity essence of the tacos while adding fresh textures. They’re easy to make and a hit with guests of all ages.
-
Coffee or Tea: A warm cup of coffee or a fragrant herbal tea rounds out the sweet experience, delivering that comforting finish to your dessert.
-
Chocolate-Covered Pretzels: Their salty crunch pairs beautifully with the sweetness of cheesecake, adding a delightful mix of flavors that keeps your palate engaged.
-
Mini Cupcakes: These bite-sized treats add variety and sweetness to the dessert table, keeping the festive spirit alive and offering different textures to enjoy alongside your tacos.
Make Ahead Options
These Fruity Pebbles Cheesecake Tacos are a wonderful choice for meal prep, especially when you’re juggling a busy schedule! You can prepare the taco shells up to 2 days in advance; simply mix the fruity cereal with melted butter, press into molds, and chill until set. The cheesecake filling can be made up to 24 hours ahead and stored in an airtight container in the refrigerator. This keeps it fresh and ready to go! When you’re ready to serve, simply fill the cooled shells with the cheesecake mixture and garnish with additional fruity cereal for that perfect crunch. Rest assured, even prepared in advance, these tacos will be just as delicious and delightful!
Fruity Pebbles Cheesecake Tacos Variations
Don’t be afraid to let your creativity shine with these fun twists on a delightful classic!
-
Chocolate Delight: Swap the fruity cereal with Cocoa Pebbles for a rich, chocolatey version that’s sure to please chocolate lovers.
-
Spiced Twist: Use Cinnamon Toast Crunch for a warming hint of spice. This adds a cozy flavor that perfectly complements the cheesecake filling.
-
Tropical Fusion: Mix in shredded coconut or use a coconut-flavored cereal for a beachy vibe. Top with fresh pineapple for an extra tropical touch.
-
Nutty Addition: Fold in crushed nuts like pecans or walnuts into the cheesecake filling for an added crunch that enhances both flavor and texture.
-
Adult-Approved: Add a splash of your favorite liqueur, such as Kahlúa or amaretto, to the filling for a sophisticated twist that’ll impress at gatherings.
-
Seasonal Swaps: Use pastel-colored cereals around Easter or pumpkin spice cereals in the fall to create a seasonal flair that keeps things festive.
-
Fruit Explosion: Stir in some chopped fresh fruit like strawberries or bananas into the cheesecake filling for bursts of flavor, making each bite a juicy surprise.
-
Healthier Version: Use a sugar-free cereal to create a lighter version, and substitute the cream cheese with Greek yogurt for a protein-packed twist without sacrificing taste.
Storage Tips for Fruity Pebbles Cheesecake Tacos
Fridge: Store assembled tacos in an airtight container in the refrigerator for up to 4 hours to maintain their crunch; they taste best fresh!
Shells: Make taco shells up to 2 days in advance. Keep them in an airtight container to ensure they stay crisp until you’re ready to fill them.
Filling: The cheesecake filling can be prepared up to 24 hours ahead. Keep it covered in the fridge for maximum freshness and to maintain its creamy texture.
Reheating: Avoid reheating filled tacos, as they are best served cold or at room temperature. Enjoy the delightful contrast of textures right after assembly!
Expert Tips for Fruity Pebbles Cheesecake Tacos
-
Optimal Shell Texture: Chill the taco shells for at least 30 minutes to ensure they hold their shape. This will prevent sogginess when filled with the cheesecake.
-
Egg-Free Delight: Since this recipe is vegetarian, there’s no need for eggs. You can easily make them safe for kids by ensuring all ingredients are fresh and high-quality.
-
Perfectly Fluffy Filling: Avoid overmixing the cream cheese and whipped cream mixture. Gentle folding helps to preserve the airy texture of your cheesecake filling.
-
Stay Colorful: For the best presentation, use brightly colored fruity cereal and garnish generously. This not only enhances taste but also makes your Fruity Pebbles Cheesecake Tacos visually appealing!
-
Plan Ahead: Make the shells a day in advance and store them in an airtight container. Just keep the filling separate until you’re ready to assemble your tacos for the freshest taste.
Fruity Pebbles Cheesecake Tacos Recipe FAQs
How can I select the right fruity cereal for the shells?
Absolutely! Look for colorful, fruity cereals that are crunchy and not overly sugary. The goal is a vibrant shell that holds up well. Avoid any that appear stale, as dark spots or a dull texture indicate they may not provide the best taste or crunch.
What is the best way to store assembled Fruity Pebbles Cheesecake Tacos?
To maintain their delightful crunch, store assembled tacos in an airtight container in the refrigerator and consume them within 4 hours. This way, you can enjoy that perfect texture, as they taste best fresh! If you can, assemble them right before serving for maximum enjoyment.
Advertisement
Can I freeze the cheesecake filling?
Yes, you can freeze the cheesecake filling! Simply place it in a freezer-safe container, leaving some room for expansion. It will keep well for up to 3 months. To use, thaw in the refrigerator overnight and re-whip it lightly if needed for that wonderfully fluffy texture again.
What should I do if my taco shells are soggy?
No worries! If your shells have turned soggy, the main factor could be assembling them too early. It’s best to fill the tacos no more than 4 hours before serving. If they do become soggy, you can always make fresh shells again and enjoy the tasty filling on its own or serve it in a parfait style!
Are these tacos safe for children with allergies?
Great question! This recipe is egg-free and can be tailored for those with specific allergies. Always check your preferred cereal and other ingredients to ensure they’re allergy-friendly. If you’re unsure, you might want to use gluten-free cereals or other substitutes like coconut cream for a different texture in the filling.
What’s the ideal way to prepare the components ahead of time?
To get the best results and ease your assembly process, you can do the following: Prepare the taco shells up to 2 days in advance and store in an airtight container. Make the cheesecake filling up to 24 hours ahead and keep it tightly covered in the fridge. Just be sure to assemble shortly before serving to keep everything fresh and crunchy!
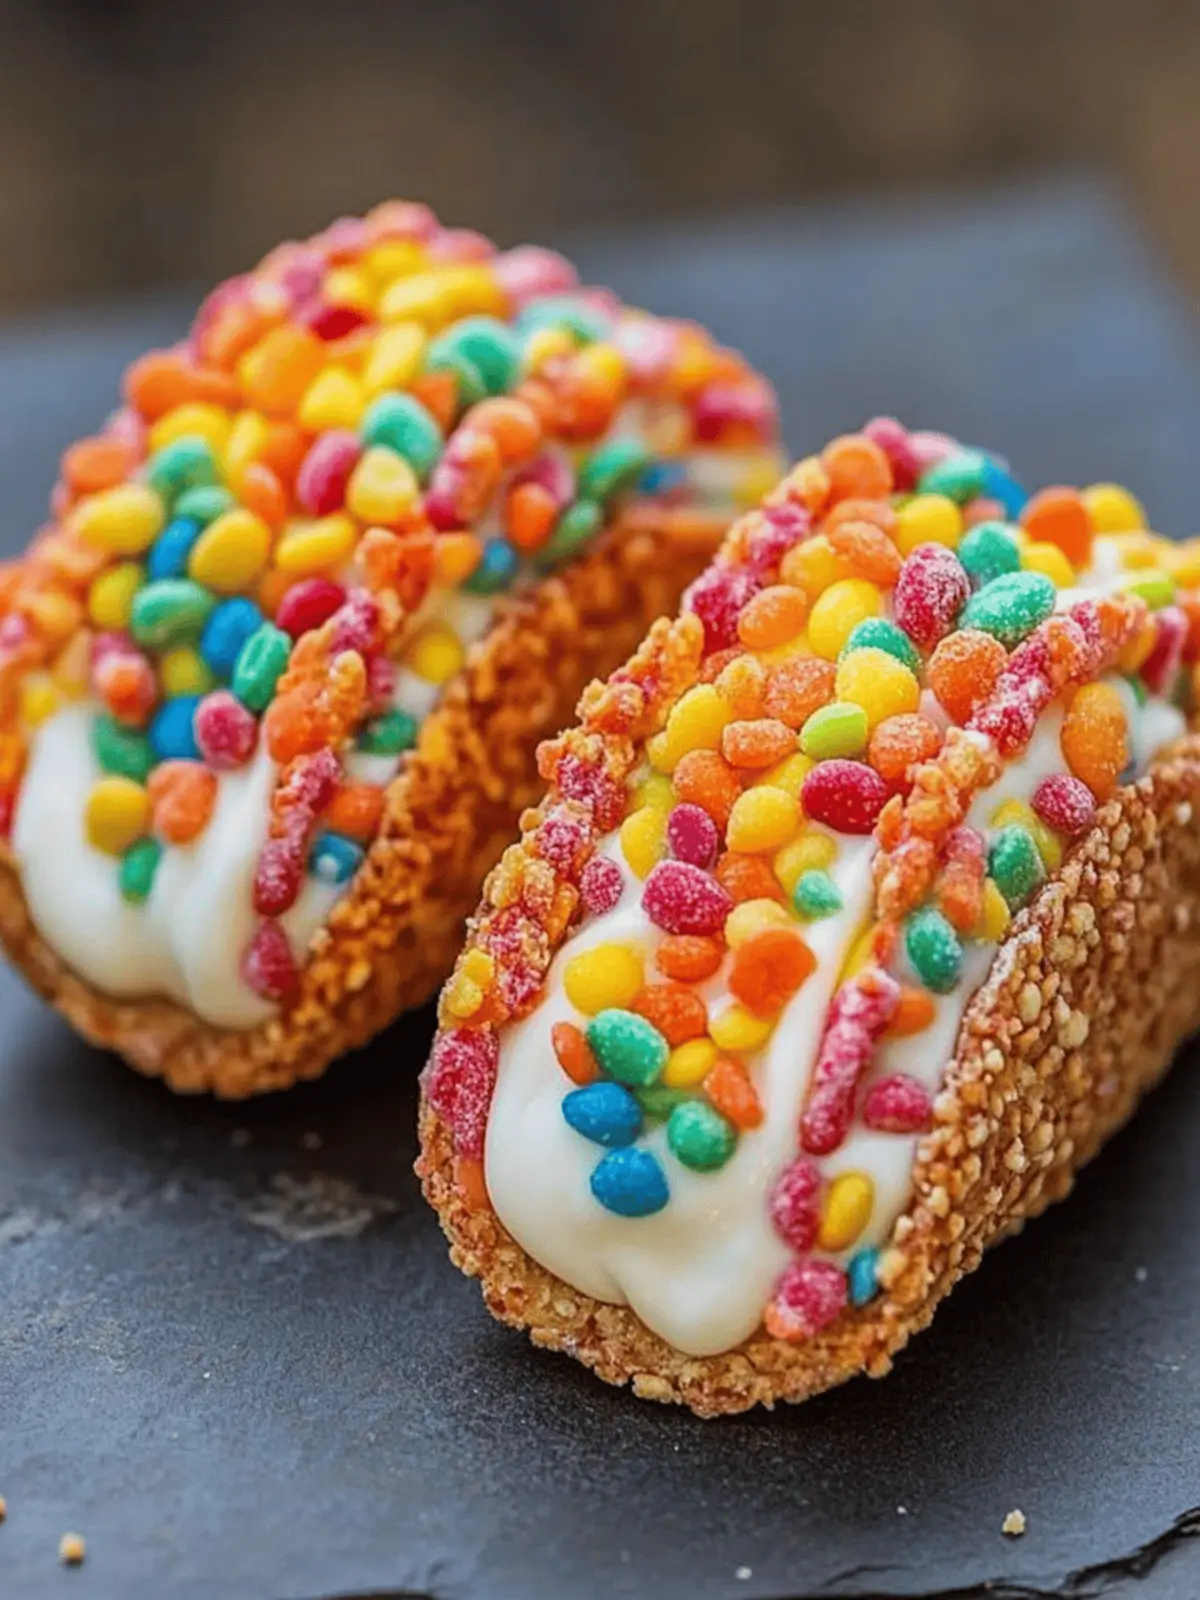
Delightful Fruity Pebbles Cheesecake Tacos for Sweet Moments
Ingredients
Equipment
Method
- Mix the fruity cereal with melted butter in a large bowl until coated. Press into taco-shaped molds and chill for at least 30 minutes.
- Beat the cream cheese until fluffy. Gradually add powdered sugar and vanilla, mixing until creamy.
- Gently fold in whipped cream until well combined.
- Once shells are set, spoon creamy cheesecae filling into each shell.
- Sprinkle additional fruity cereal on top for garnish.
